Converting PowerShell scripts into executable files has become an essential practice for developers and IT professionals aiming for easier deployment and distribution. PS2EXE is a powerful tool that allows you to transform your .ps1 scripts into .exe files, ensuring that your scripts run seamlessly on Windows systems without requiring PowerShell to be manually executed. Properly installing and configuring PS2EXE on Windows is the first step toward leveraging its full potential, making your automation processes more efficient and reliable.
In this guide, we’ll walk you through the step-by-step process of installing PS2EXE correctly on your Windows machine. From downloading the latest version to setting up environment variables and testing your first executable, you’ll gain practical insights to avoid common pitfalls and ensure smooth operation. Whether you’re a beginner or an experienced developer, mastering PS2EXE installation will streamline your workflow and enhance your PowerShell script management.
System Requirements
Minimum Hardware Requirements
To ensure your software or application runs smoothly, understanding the minimum hardware requirements is essential. This typically includes the lowest specifications of processor speed, RAM, storage, and graphics capabilities necessary to launch and operate the program without crashes. While minimum requirements allow basic functionality, they may limit performance and multitasking. For example, having 4GB RAM and a dual-core processor might let the software open, but it may lag during intensive tasks. Always compare these specifications with your existing system before installation to avoid performance issues.

Recommended Hardware for Optimal Performance
While minimum requirements allow the software to run, the recommended hardware ensures a seamless and efficient experience. This usually involves faster processors, higher RAM (8GB or more), dedicated graphics cards, and ample storage space. Meeting recommended requirements not only improves speed and responsiveness but also enables advanced features, smoother multitasking, and better visual performance. Users seeking professional-level usage or high productivity should prioritize these specifications over the minimum. Investing in recommended hardware often extends the software’s longevity and reduces the need for frequent system upgrades.
Operating System Compatibility
System requirements are not only about hardware; operating system (OS) compatibility is crucial. Software may require specific versions of Windows, macOS, or Linux to function properly. Using an unsupported OS can lead to installation failures, system conflicts, or missing features. For example, some modern applications demand Windows 11 or macOS Ventura for advanced features. Always check whether your current OS version aligns with the software requirements, and ensure that necessary updates or patches are installed to maintain compatibility and security.
Software Dependencies and Prerequisites
Many applications require additional software dependencies such as .NET frameworks, Java, or specific libraries. Ignoring these prerequisites can cause the software to malfunction or fail to launch. This also includes certain drivers for graphics, audio, or peripheral devices. Keeping dependencies updated ensures that the software operates as intended and reduces errors. Always consult the official documentation to identify required software components and maintain them regularly, as outdated dependencies can impact performance and security.
Network and Internet Requirements
Modern applications often rely on network connectivity for updates, cloud features, or online collaboration. The system requirements may specify minimum bandwidth, latency, or internet speed for optimal performance. For enterprise or cloud-based tools, stable and secure network connections are critical to avoid data loss or synchronization issues. Users should consider both wired and wireless connectivity options, as well as firewall and proxy settings, to ensure uninterrupted access and smooth functionality across all network-dependent features.
Downloading PS2EXE
PS2EXE is a powerful tool that converts PowerShell scripts (.ps1) into standalone executable (.exe) files. This conversion is particularly useful for developers, system administrators, and IT professionals who want to distribute scripts without exposing the raw code. Before diving into downloading PS2EXE, it’s important to understand its significance: it helps enhance security, simplifies script deployment, and ensures compatibility across different Windows systems.
Official Sources for PS2EXE Download
To ensure safety and reliability, always download PS2EXE from official or trusted sources. The most recommended method is through the PowerShell Gallery, a secure repository maintained by Microsoft. Users can also find PS2EXE on trusted GitHub repositories. Avoid downloading from random websites, as unofficial sources may contain malicious files that could compromise your system security.
System Requirements Before Download
Before downloading PS2EXE, verify that your Windows system meets the basic requirements. PS2EXE is compatible with Windows 7 and above, and it requires an active installation of PowerShell (version 5.0 or higher is ideal). Ensure your system has sufficient permissions to install scripts and executables, especially in enterprise environments where administrative restrictions may apply. Checking these prerequisites prevents installation errors and ensures a smooth setup process.
Step-by-Step Download Process
Downloading PS2EXE is straightforward. For the PowerShell Gallery method:
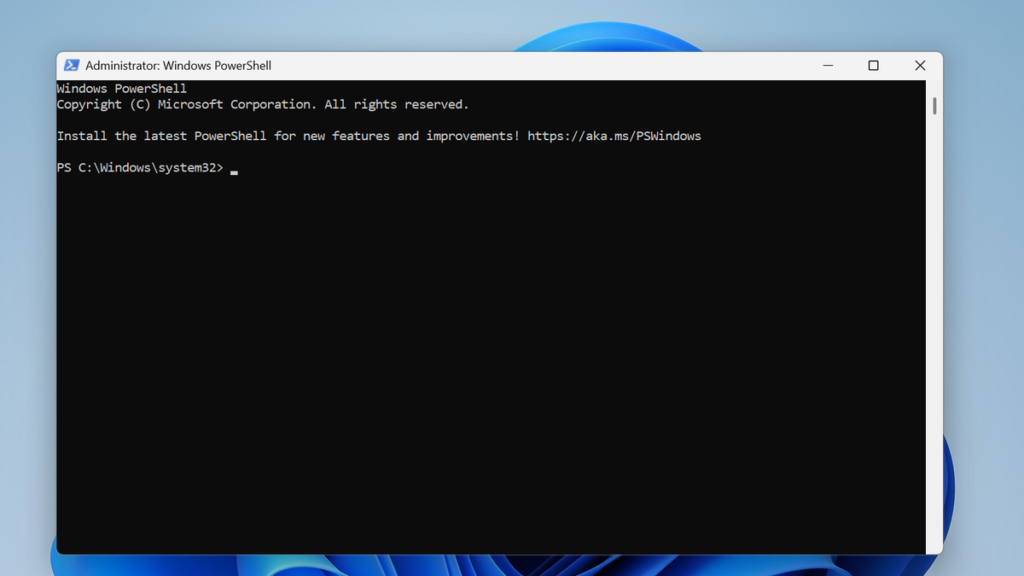
- Open PowerShell as an administrator.
- Run the command: Install-Module -Name ps2exe
- Confirm any prompts to trust the repository.
For GitHub downloads, navigate to the PS2EXE repository, download the latest release, and extract the files to a convenient location. Following these steps carefully guarantees a clean and functional installation, ready for script conversion tasks.
Post-Download Checks and Setup
After downloading, it’s important to verify that PS2EXE is properly installed. Run the command Get-Command ps2exe in PowerShell to confirm recognition. Additionally, review the module’s help documentation using Get-Help ps2exe to familiarize yourself with its parameters and usage. Performing these post-download checks ensures that PS2EXE works seamlessly, allowing you to convert scripts to executables efficiently and without unexpected errors.
Installation Steps
Preparing Your System for Installation
Before starting any installation, it’s crucial to ensure your system meets the necessary requirements. This includes checking the operating system version, available disk space, and ensuring that all essential updates and drivers are installed. Running a system scan for potential conflicts or outdated software can prevent errors during installation. Additionally, creating a restore point is highly recommended, so you can revert your system if anything goes wrong during the installation process.
Downloading the Installer Package
Once your system is ready, the next step is to obtain the official installer package from a trusted source. Always download software from the official website or verified distributors to avoid malware or corrupted files. Pay attention to the version you’re downloading—make sure it matches your system architecture (32-bit or 64-bit). Save the file in a location that is easily accessible, such as the Desktop or Downloads folder, to simplify the next steps of installation.
Running the Installation Wizard
After downloading, locate the installer file and double-click to launch the installation wizard. Follow the on-screen instructions carefully. Most installers guide you through license agreements, choosing the installation location, and selecting optional features. Reading each step attentively ensures that you install the software correctly and choose the settings that best suit your needs. Avoid skipping prompts, as some offer important configurations that affect performance and usability.
Configuring Installation Settings
During installation, you may be prompted to customize various settings. This could include selecting additional components, adjusting default file paths, or enabling automatic updates. Configuring these options allows you to tailor the software to your workflow and ensures optimal performance. For users who prefer default settings, most installers provide a “Recommended” option which balances simplicity with efficiency. Making informed choices here can save troubleshooting time later.
Finalizing Installation and Verifying Success
Once the installer completes, it’s important to verify that the software is installed correctly. Launch the application and check for proper functionality. Some programs may require a system restart to finalize configuration. Additionally, exploring the software’s settings or running a test task ensures that all components are working as intended. Keeping the installer file for future use or backup is also a good practice. Proper verification guarantees that your installation is secure, complete, and ready fo
Converting PowerShell Scripts to EXE
PowerShell scripts are powerful tools for automating tasks, system management, and application deployment on Windows environments. However, running .ps1 files directly requires PowerShell execution policies to be configured, which can sometimes lead to security warnings or execution failures. Converting PowerShell scripts into executable .exe files provides a more professional, user-friendly, and secure way to distribute scripts. This method allows users to run automation tasks without directly opening PowerShell, reducing the risk of accidental modification and simplifying deployment across multiple systems.
Why Convert PowerShell Scripts to EXE
There are multiple reasons to convert a PowerShell script to an executable format:
- Ease of Distribution: EXE files are easier to share and execute, especially for users who are not familiar with PowerShell.
- Enhanced Security: Converting scripts to EXE helps prevent unauthorized editing and tampering.
- Professional Deployment: EXEs integrate seamlessly with Windows environments, making automation more polished and consistent.
- Simplified Execution: Users can run a single file without adjusting execution policies or PowerShell settings.
- Integration with Scheduling Tools: EXE files can easily be scheduled in Task Scheduler without extra configuration.
These benefits make EXE conversion essential for IT administrators, developers, and QA teams looking for streamlined automation solutions.
Tools Used for Conversion
The most popular tool for converting PowerShell scripts to executable files is PS2EXE. PS2EXE is an open-source utility that wraps PowerShell scripts into standalone executables. Some key features include:
- Support for both GUI and console applications
- Ability to hide PowerShell windows for a clean user experience
- Option to embed script dependencies within the EXE
- Compatibility with all modern Windows versions
Other tools, like third-party script packagers, exist, but PS2EXE is widely trusted due to its simplicity, reliability, and active community support.
Step-by-Step Process for Conversion
Converting a PowerShell script into an EXE involves a few straightforward steps:
- Install PS2EXE: Use PowerShell to install PS2EXE from the PowerShell Gallery using the command: Install-Module -Name ps2exe.
- Prepare Your Script: Make sure your script is fully tested and free of errors. Add comments and logging if necessary.
- Convert to EXE: Use the command Invoke-PS2EXE -InputFile YourScript.ps1 -OutputFile YourScript.exe. You can also specify options like window style or icon.
- Test the EXE: Run the executable on a clean system to ensure it functions as expected.
- Deploy: Share or distribute the EXE to users, integrate with scheduling tasks, or deploy in enterprise environments.
This process is simple yet ensures a professional and secure deployment of automation scripts.
Best Practices for Distributing PowerShell EXEs
Once your script is converted to an EXE, following best practices ensures optimal performance and security:
- Sign Your EXE: Digitally signing the executable increases trust and prevents security warnings.
- Maintain Version Control: Keep track of updates and changes to ensure smooth updates for end users.
- Include Logging: Add logs to track execution and errors, which is crucial for troubleshooting.
- Test on Multiple Systems: Validate that the EXE works across different Windows versions and configurations.
- Document Usage: Provide clear instructions for users on how to run and configure the EXE if needed.
By following these guidelines, you ensure your PowerShell scripts are delivered professionally, securely, and efficiently in executable format.
Testing and Troubleshooting
Testing is the backbone of any software development or hardware implementation process. It involves systematically evaluating a system, application, or component to ensure it meets defined requirements and performs as expected. Effective testing uncovers defects early, reduces development costs, and ensures user satisfaction. There are multiple types of testing, including functional testing, performance testing, regression testing, and user acceptance testing. Understanding these fundamentals helps teams identify which testing strategy is appropriate for a specific scenario, ensuring that potential issues are caught before deployment.
Importance of a Testing Strategy
A structured testing strategy is essential to ensure comprehensive coverage and efficient defect detection. This strategy defines what will be tested, how it will be tested, the sequence of tests, and the resources required. A well-defined strategy prevents redundant testing, reduces time wastage, and increases the accuracy of results. It also helps teams prioritize critical functionalities and focus on areas with the highest risk of failure. By having a clear roadmap, businesses can achieve consistent quality assurance, minimize post-release errors, and enhance the overall reliability of their product.
Common Troubleshooting Techniques
Troubleshooting is a systematic approach to identifying, diagnosing, and resolving issues in software or hardware systems. Effective troubleshooting starts with recognizing symptoms and collecting relevant data, such as error messages or logs. Common techniques include isolating the problem, checking recent changes, testing individual components, and using diagnostic tools to track errors. Troubleshooting also involves pattern recognition, as similar issues often have similar root causes. By applying these techniques, teams can resolve problems faster, reduce downtime, and prevent minor issues from escalating into critical failures.
Tools and Automation in Testing
Modern testing relies heavily on automation tools to increase efficiency, consistency, and coverage. Tools like automated test suites, performance monitoring software, and debugging platforms enable teams to execute repetitive tests quickly and accurately. Automation also supports continuous integration and deployment (CI/CD) pipelines, allowing developers to identify defects immediately after code changes. Additionally, automated logging and monitoring tools assist in real-time troubleshooting by providing detailed insights into system behavior. Leveraging these tools reduces manual effort, ensures faster delivery, and improves overall product quality.
Best Practices for Effective Testing and Troubleshooting
Adopting best practices enhances the effectiveness of testing and troubleshooting processes. Key practices include documenting test cases, maintaining version control, prioritizing critical issues, and regularly updating testing frameworks. Encouraging cross-team collaboration helps in sharing knowledge and speeding up problem resolution. Continuous learning from past issues and implementing preventive measures can significantly reduce recurring errors. Furthermore, integrating feedback loops from users ensures that real-world issues are captured and addressed promptly. Following these best practices ensures a proactive approach, leading to more reliable systems and higher user satisfaction.
Best Practices for Using PS2EXE
Before diving into converting PowerShell scripts to executable files, it’s crucial to fully understand what PS2EXE does. PS2EXE allows you to transform .ps1 scripts into .exe files, making them easier to distribute and run on systems without requiring PowerShell to execute scripts. Understanding its functionality helps you anticipate potential compatibility issues, avoid runtime errors, and structure your script efficiently. Always review your code for dependencies and external modules to ensure that the compiled .exe works seamlessly across different Windows environments.
Keep Your Scripts Clean and Modular
Clean and well-structured scripts reduce errors during the PS2EXE conversion. Organize your script into logical modules or functions, remove redundant code, and include comments to clarify complex logic. Modular scripts are easier to maintain, debug, and update after compilation. Additionally, eliminating unused variables or external dependencies ensures that your .exe file remains lightweight, improving performance and reducing the risk of conflicts on target systems. A tidy script also enhances readability, which is valuable for team collaborations and future edits.
Test Extensively Before and After Conversion
Testing is a critical step to ensure that the converted .exe functions as intended. Run your PowerShell script in its native .ps1 format to verify logic and output. After conversion using PS2EXE, test the .exe on multiple Windows versions to check for compatibility issues. Pay attention to execution policies, file paths, and permissions, as these often differ between scripts and executables. Comprehensive testing prevents deployment failures and ensures a smooth user experience when your .exe is shared or distributed across various environments.
Optimize Security and Permissions
Security should be a priority when distributing PS2EXE-generated executables. Avoid hardcoding sensitive data like passwords or API keys directly into your script; use secure methods such as encrypted credentials. Configure proper execution policies and file permissions to prevent unauthorized access or accidental modifications. Additionally, consider signing your .exe digitally to assure users that it is safe to run. Implementing security best practices protects both your software and end-users while enhancing trust and credibility in professional or organizational environments.
Maintain Version Control and Documentation
Keeping track of script versions and documenting changes is essential for long-term maintenance. Each time you update your PowerShell script or recompile it into an .exe, record the changes, version number, and any relevant notes. Documentation helps collaborators understand your work, facilitates troubleshooting, and ensures that any updates don’t break existing functionality. Version control systems like Git can manage changes efficiently, while clear documentation improves workflow, supports team collaboration, and enhances professional project management when using PS2EXE for production-ready tools.
Conclusion
Properly installing PS2EXE on Windows ensures seamless PowerShell script conversion into executable files, boosting efficiency and compatibility. By following step-by-step installation guidelines, verifying dependencies, and configuring settings correctly, users can avoid errors and maximize performance. A correct setup streamlines automation, enhances workflow productivity, and supports secure, reliable script execution. Mastering PS2EXE installation empowers developers and IT professionals to create versatile, portable executables with confidence and ease.